3 Knockout PowerPoint Presentation tips to help you work (AND FEEL) like a professional presentation designer.
PowerPoint is the leading presentation software package and there are various reasons for this. One of the reasons is that PowerPoint is also the most versatile. As the saying goes, there is more than one way to “skin the cat” – and so, in different contextual situations, the software is able to adapt the way it works ‘with’ you.
PowerPoint Presentation Tip #1 – Quick Access Bar
Format your assets without looking at the screen or keyboard with the Quick Access Toolbar
Works on PC Office 2013 and PC Office 2016
Let’s start off with one of our most loved PowerPoint Presentation Tips: Customizing the Quick Access Bar (PC versions only)
Most pro users will tell you that the first and most basic thing you need to do is customize your ribbon and more particularly the quick access bar. This allows you to do frequent actions that don’t have generic shortcuts much faster, including actions such as: paste without formatting, send object to the front or back, align objects to the top or whatever action you frequently use. In fact, for certain projects, you can change the quick access bar for those annoying repetitive tasks. All you need to do is invoke these commands when you have set them up us “Alt + number” so, for example, “Paste and Keep Text Only” (text without any inherent formatting) would be “Alt 3,” according to our example.
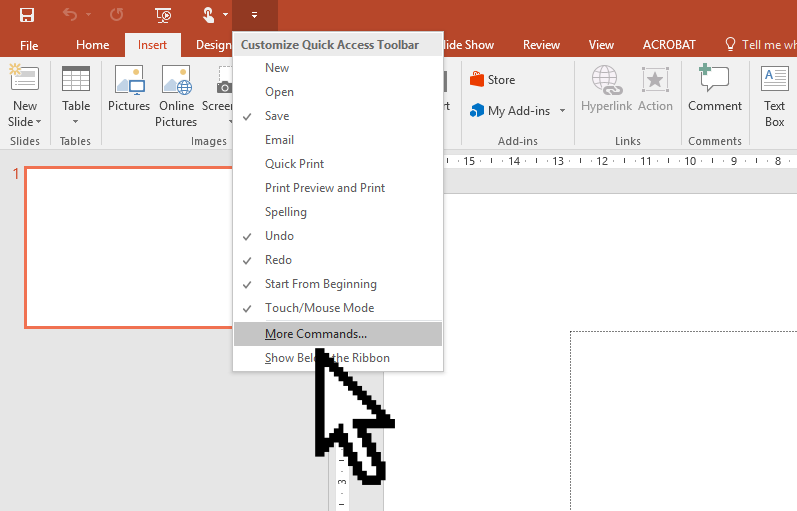
PowerPoint Tip 1 Step 1 How to customize the PowerPoint Quick Access bar
Open the settings dialogue by clicking “Customize Quick Access Bar” and then “More Commands”
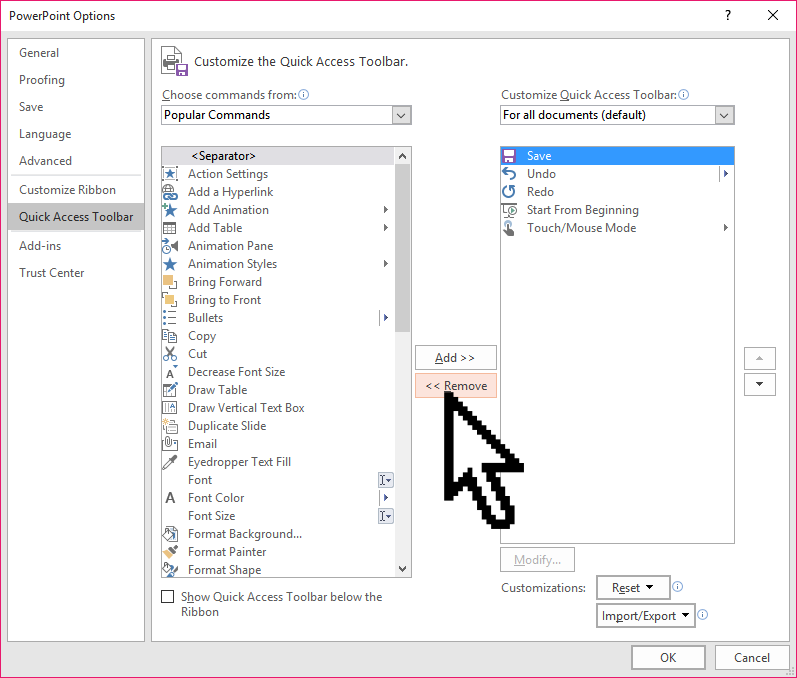
PowerPoint Presentation Tip 1 Step 2 – Removing items from the Quick Access bar
Remove the ones that you don’t need that are currently taking up space; there are already generic shortcuts for copy, paste, undo and redo, and the shortcut to view your presentation is F5. Let’s just remove all of them, you can always revert back to them if you want.
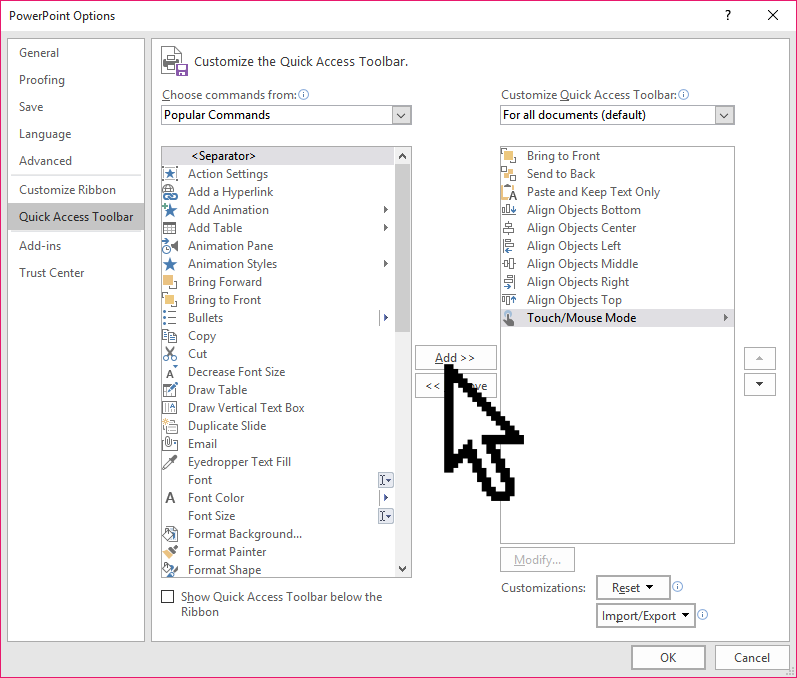
PowerPoint Tip 1 Step 3 – Adding items to the Quick Access bar
Add all of the new commands that you would like to access via the shortcut “Alt + number,” here are some of our favorites.
PowerPoint Presentation Tip 1 Step 4 – Confirm your selection for the Quick Access bar
Click on OK and you’re done.
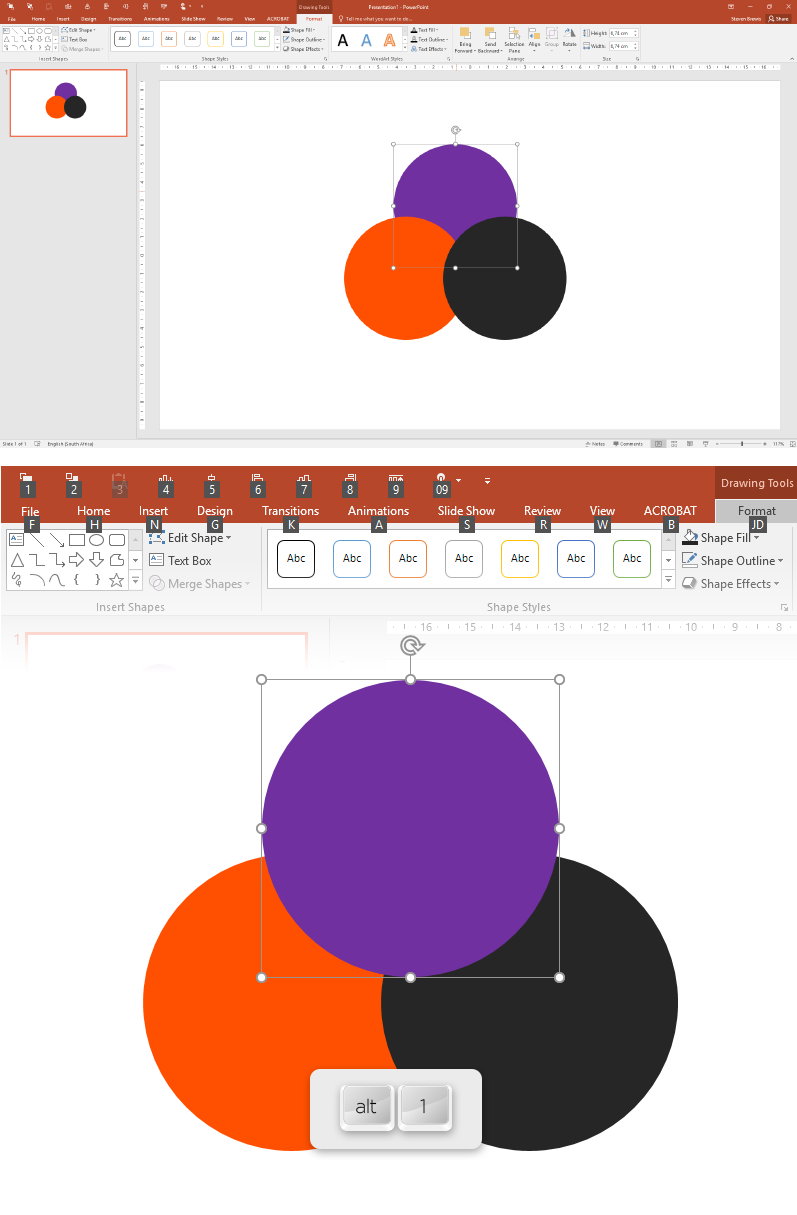
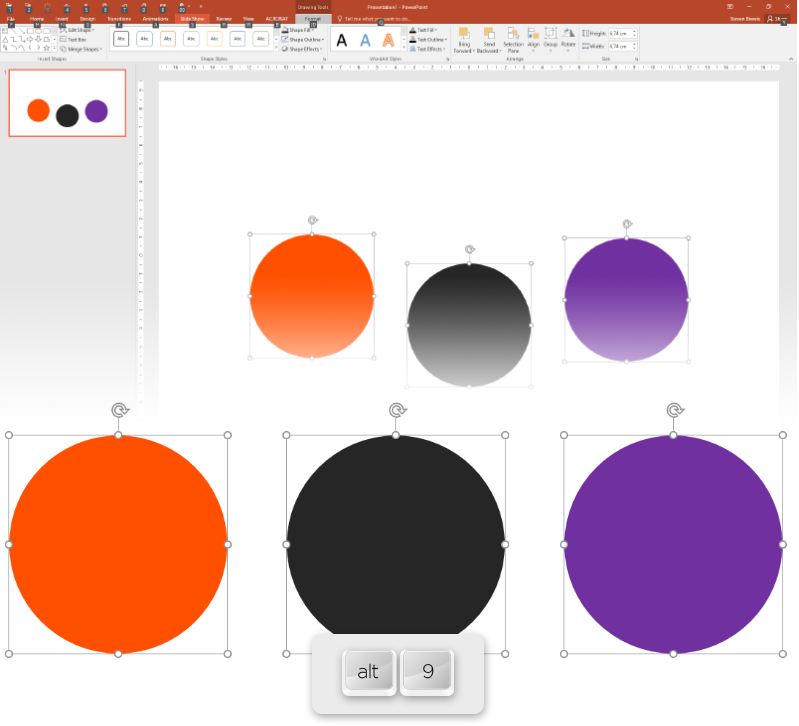
Example 1: So to bring the purple circle to the front all you need to press is “Alt 1.”
Example 2: To align all the circles to each other’s top press alt 9
You can add a whole lot more, but the shortcuts only really make sense up to number 9 after that it becomes slightly more cumbersome because PowerPoint adds a 0 digit. However, it still works and you can just click on the shortcut with the mouse if you forget the shortcut code.
PowerPoint Presentation Tip #2: Advanced PowerPoint selection
Works on all PC/Mac Versions of Office
PowerPoint Presentation Tip 2 Selection marquee
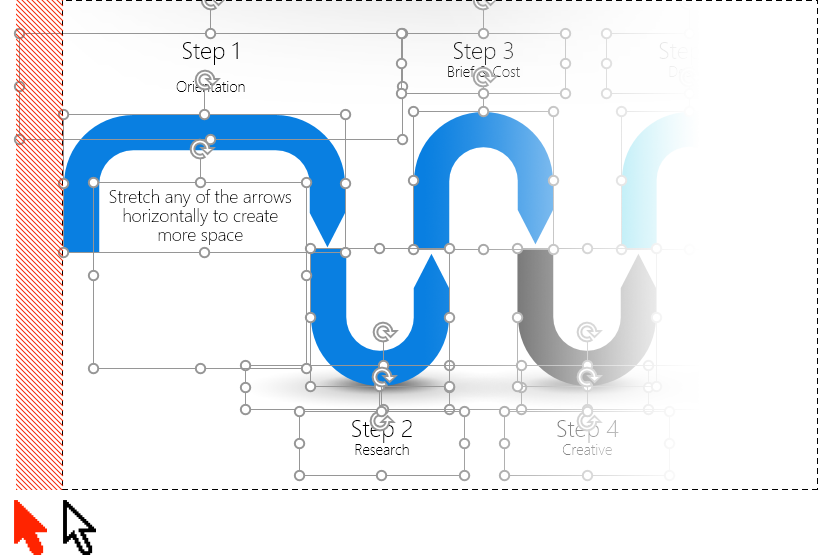
To select multiple items in PowerPoint, you need to make sure you draw your marquee over the entire object and not just part of it – this includes the invisible part of that object – if you omit it, the frustration is enough to drive even the most passive person insane. So to solve this, simply add it to your selection by pressing and holding down the Shift Key and clicking on the object.
PowerPoint Presentation Tip 2 Invert Selection
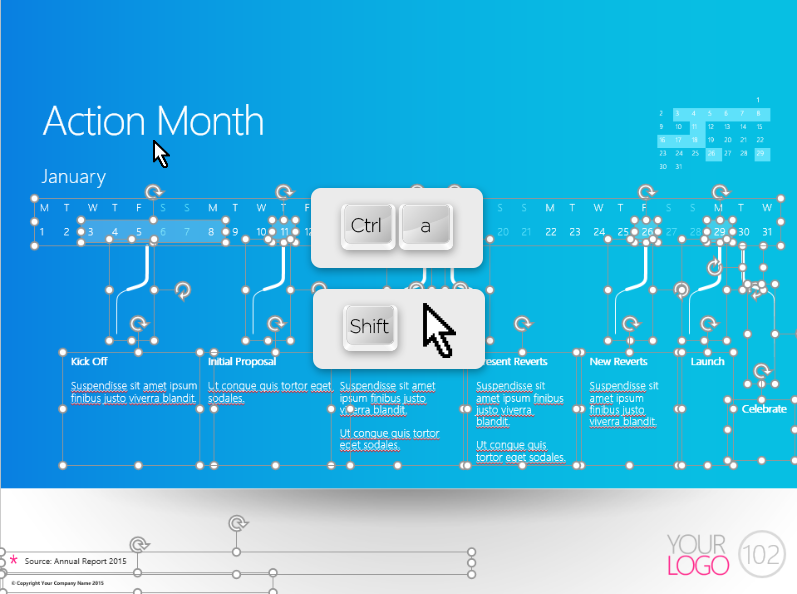
To Select everything on the screen except for one or more objects, press Ctrl-A (to select everything), and then keep the Shift key pressed down while you deselect one or more items.
PowerPoint Presentation Tip 3 Grouping Items
Items can also be grouped together, so if the page is getting messy just select everything in that section and press Ctrl-G(PC) / Command-G (Mac). To ungroup – press Ctrl-Shift-G (PC) / Command-Shift-G (Mac).
PowerPoint Quirk Alert: You cannot group objects that are originally Master Placeholders, so one solution to this problem is to select all of your objects. You can do this by right-clicking on one of the borders and then selecting Save as Picture, deleting your objects and importing the new picture (you will lose image quality).
PowerPoint Presentation Tip #3:
Import Vector Icons or graphics and edit their colors and shapes directly in PowerPoint
Works on PC Office 2013 and PC/Mac Office 2016
Important Update January 2017. The latest version of PowerPoint that is part of the Office 365 suite now allows you to import SVG vectors directly into PowerPoint without the use of third party software, all you need to do is import or drag and drop it like you would with any graphic. The instructions below, do still give you a little more editing control (ungrouping and editing most vectors) so it might still be handy to know in the future. If you are using and older version of PowerPoint then this is still valid.
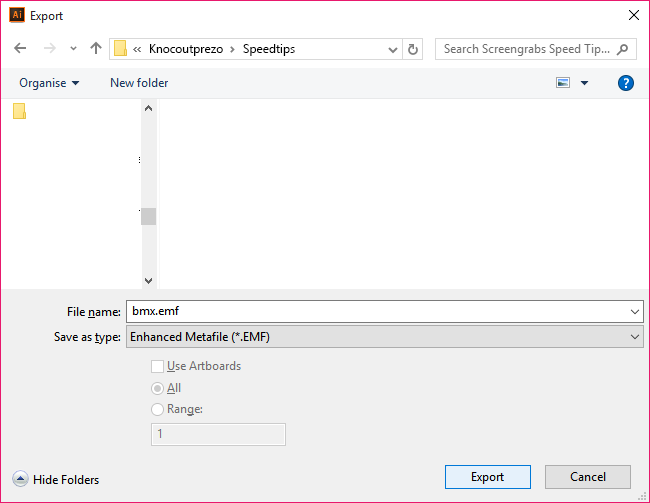
Importing a vector document into PowerPoint has many benefits, it means you spend less time in Photoshop, it means your file sizes are smaller and your graphics are super crisp and scalable. PowerPoint allows you to import EMF (Enhanced Metafile) documents, (and yes, most people have never heard of them but it turns out most vector editing applications such as Adobe Illustrator will export to EMF). If you have the latest version of PowerPoint 2016 and Adobe Illustrator CC you can also copy and paste the document from Illustrator directly by just clicking on the “Paste” dropdown and then selecting “Paste as Image” (Skip to step 2):
PowerPoint Presentation Tip 3 Step 1 Import the Vector
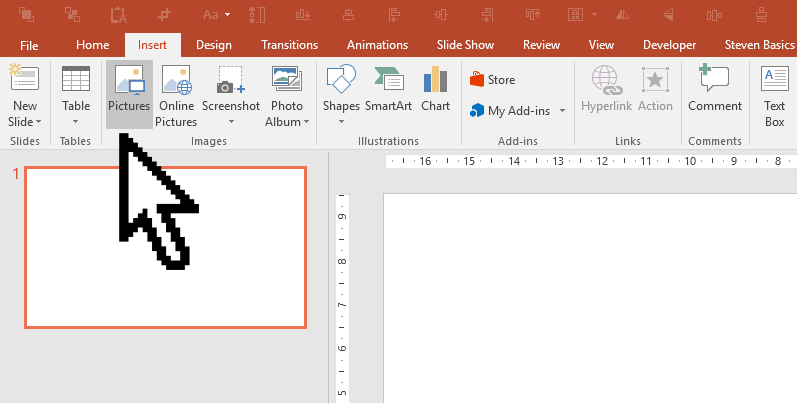
Import your vector file (EMF) as a picture into PowerPoint.
PowerPoint Presentation Tip 3 Step 2 Ungroup your vector image
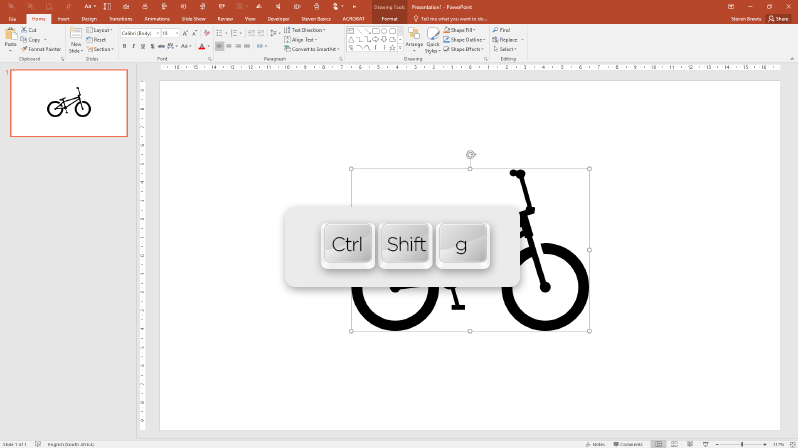
Ungroup (Ctrl-Shift-G) your imported EMF file. When you first import the EMF document into PowerPoint, it is already a vector file but still not ‘really’ editable. To make it editable, you need to ungroup it twice (Ctrl-Shift-G) and then again (Ctrl-Shift-G).
When you ungroup it the first time, PowerPoint will let you know that it is actually not a group and it will convert the EMF to a MS drawing object – to which you simply say yes (Or press Enter).
PowerPoint Presentation Tip 3 Step 3 Remove canvas
Delete the invisible layer
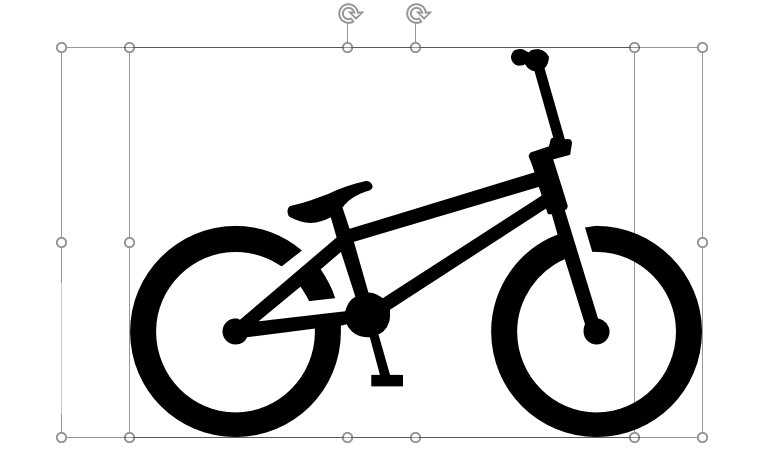
There is a “quirk” when you ungroup your newly imported vector files into PowerPoint. The object it creates has a weird invisible evil twin in the back (the artboard from Adobe Illustrator). You don’t need to delete it, but it often just gets in the way when you want to edit the other elements because it is normally on top of them so click around the boundaries and delete it or move the visible parts away and then delete it.
Sometimes you need to ungroup again and again depending on the object, and now you can edit individual elements in the object once they are ungrouped. When you are done editing, it is normally a good idea to group all of your objects again. PowerPoint also remembers how the document was created, so if you used lines in Illustrator, PowerPoint will import the lines too. It does sometimes happen that PowerPoint won’t break the objects apart, and then you may need to change the original vector document before it is exported to EMF, but you will still be able to change the fill and line parameters.

Hope you learned something from these PowerPoint Presentation Tips and if you have any questions please let us know.


